DIY Woven Bookmark
Learn to make an easy woven bookmark for Mother’s Day.
Here you can read about how to make a woven bookmark – it’s a great project for beginners and is a lot of fun to make!
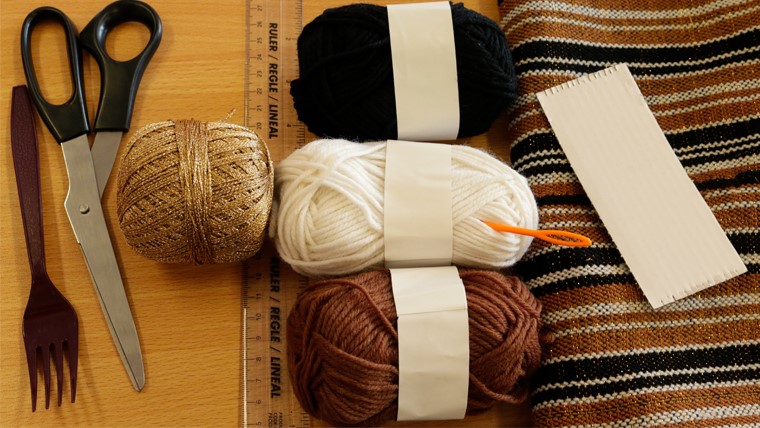
What you need:
- Yarn or wool (variety of different colours)
- Medium weight cardboard
- Comb with large teeth or a plastic fork
- Tape
- Scissors
- Weaving Needle
- Ruler
Step 1: Make the cardboard loom
Using the scissors, cut out a piece of cardboard that is 5cm x 12cm. You can make this shorter or thicker depending on how you want your bookmark to look. Then make small cuts on the top and bottom of the cardboard.
Step 2: Wrap string around the loom
Tape the string to the back of the loom, and begin wrapping the string around the loom. Make sure this is wrapped fairly tightly. The string should sit in the incisions that have been cut in the loom. After you’ve finished, tape the back of the string to the cardboard and cut the string.

Step 3: Start weaving
Cut a piece of yarn roughly the length of your arm and start off by threading your needle. Beginning at one end of the cardboard, weave the yarn by going over and under the string on the cardboard. You can use the fork/comb to push down the yarn so that it sits tightly together.

Step 4: Continue weaving
Now repeat the same steps in the opposite direction. This time you will want to do the opposite way – go under then over – otherwise you will undo what you’ve done. Continue this for several rows - it all depends on how thick you want to make each row. When you’re done with a colour, leave the loose ends of yarn as they will be tucked away at the very end.

Then start with a different colour yarn and use the same technique as mentioned above. Don’t forget to leave the loose ends of the yarn.
Step 5: Remove the bookmark from the loom
Once you’re done, cut the strings at the back and remove the bookmark from the loom. Tie knots as close to the bookmark as possible using 2 strings at a time.
Now it’s time deal with the loose yarn on the side. Using the needle, weave the loose yarn back in the bookmark. Make sure to hide them as best as possible.

Ta-da! You have made a bookmark!